Tour du Mont Blanc: Things we wish we'd known
Disclaimer
No guarantee is given about the correctness or accuracy of the information contained in this post. Anything that happens to you while trusting a part or all of the information contained in this post is your sole responsibility.
In the summer of 2015 we did the Tour du Mont Blanc. This post details things we wish we’d known when we set out.
Resources
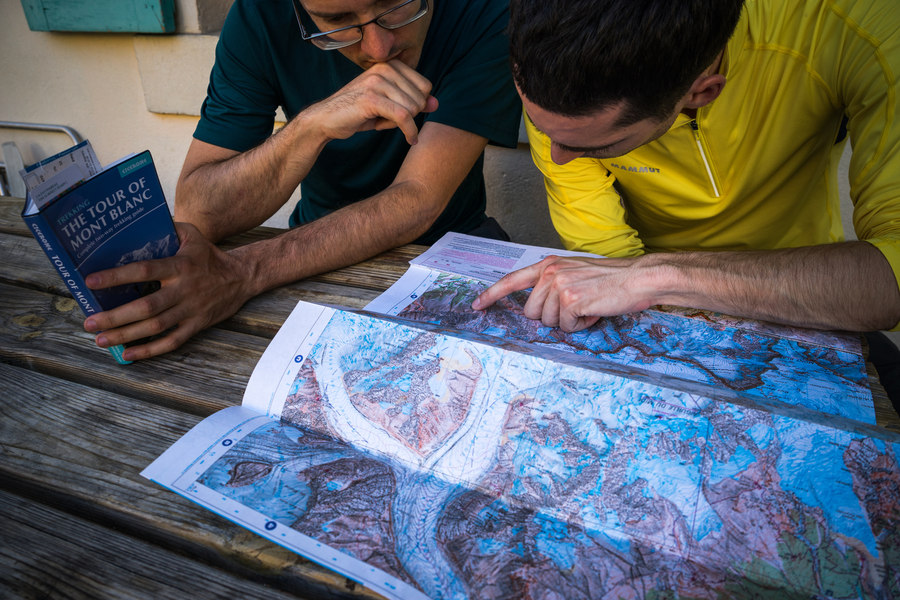
We based our research and planning on the Tour of Mont Blanc Cicerone guide. It covers all important aspects of the tour, although its proposed planning, accommodations and break down of the tour into days should not be followed blindly (more on that later).
We also had two (for redundancy) GPS devices preloaded with each day’s planned tracks and any possible alternatives (“variantes”) in case of bad weather. While on the tour, we found ourselves checking them quite a few times to find out where to go or to ensure we were on the right track and also to track our progress.
Finally, we also had the IGN 3531 ETR and IGN 3630 OTR 1:25000 waterproof maps and a compass. This was “just in case” and we eventually never had to use them “en route”. At 33 € without shipping (March 2015), these maps are quite expensive. If you want to save some money, you can buy the regular paper version, but you have to come up with your own waterproofing solution (e.g. a map case).
Language
It is said that French is the “official” language of the tour, but we had no problem communicating in English.
Money
The currency of France and Italy is the Euro. The currency of Switzerland is the Swiss Franc (CHF). Even though all three Swiss accommodations we stayed in accepted Euros, we exchanged the necessary amount of Francs at a bank beforehand to secure a better rate.
It’s relatively easy to calculate how much money you will need to pay for your accommodation and daily needs. If you plan to stay in Courmayeur and/or Chamonix, take into account that they are more expensive.
Note that not all places accept credit/debit cards, so make sure you ask first and carry enough cash just in case.
When to go
We decided to go around the middle of July, from the 11th until the 21st, in an effort to avoid the crowds (which according to the guide start gathering after the 15th), and to ensure any remaining snow has melted away.
Going on August was out of question since it’s known to be the busiest time, plus near the end of August the UTMB race is held which brings even more people.
We did run into groups of people at times, but starting early and going relatively fast allowed us to pass everyone early on and to have the route almost to ourselves until our destination.
What to expect in terms of weather
Summers in the Alps are hot and sunny, with occasional thunderstorms at noon. We were pretty lucky and got rain only one day (the 8th), but that one day was pretty frightening. Bad weather came earlier than we anticipated and we were caught in the middle of a thunderstorm with hail high up on a ridge. Luckily, we found some huts to wait out the storm, but only after becoming soaking wet and quite terrified.
You can’t control the weather, but you can at least be prepared for it. Have a pair of good waterproof garments with you (jacket, pants) and start early so that by the time a storm is brewing, you’ve left higher-altitude, dangerous terrain. A common saying is “speed equals safety in the mountains” and we’ve found this to be almost always true.
In terms of snow, there was virtually none, with the exception of a few snow patches here and there that you didn’t even had to step on. Of course, this may vary from year to year.
Booking accommodation
There is plenty of accommodation along the route, so a good question is whether you should book beforehand. We found the only reason to do so is if you want to have the option to arrive late (after 5 PM) at your destination and have your stay ensured. This also depends on when you decide to go: We went around the middle of July and witnessed a case where a hiker arrived late (around 6 PM) at Rifugio Walter Bonatti and left empty-handed since it was full. Things could be worse if you go near the end of July or in August.
On the other hand, not booking gives you the freedom and flexibility to decide on a daily basis where you will stay depending on the weather and your fitness. If you have booked, you are locked into a schedule and have to make it to your next planned destination no matter what, otherwise you risk losing your deposit (most accommodations will ask for one).
Another idea is to book only at popular accommodations (Bonatti is certainly one) you are sure to stay and carry a list of phone numbers for the rest (and a mobile phone, of course).
Whatever you decide, things get much simpler if you are fast enough and arrive a bit early at your destination each day: Not only will you almost certainly find accommodation, but you will also usually have a choice of place and/or bed and all facilities at your disposal for taking a shower, washing your clothes etc.
Smaller rooms or dormitories
Dormitories are cheaper but we found that the privacy and convenience you enjoy in smaller rooms (you don’t have tens of people trying to move and organize themselves at the same time) is worth the (usually not that big) difference in the price.
Meals and food
All accommodations offer a variety of options when it comes to food. Half-board is dinner and breakfast (in that order). Full-board includes lunch as well, but doesn’t make sense since you are hiking during that time.
Lunch packs are packages you can buy, usually with fruit, salad, sandwich, energy bar etc. We found them to be too much and too big to carry. You can also buy only sandwiches but we found that what you get for the price is rarely worth it.
We ruled out the possibility of carrying and making our own meals since our packs were already heavy without any food. And anything you carry in the tour, you carry it for 11 days. So we decided to go for breakfast-only in hotels (Courmayeur, Chamonix) and half-board everywhere else we stayed. We also carried light snacks like fruits, nuts and energy bars to consume during hiking. This worked out surprisingly well.
Even though we’re a bit picky, we found the food to be pretty good almost everywhere we stayed.
Water
We carried 2-3 liters of water, refilling at water sources along the route. In our recorded tracks shown later, some of the available water sources are marked.
We didn’t drink from streams as we were not sure about the quality of the water and did not want to risk ruining the whole tour due to a gastrointestinal infection. For safety, we also carried water purification drops but never used them.
To replenish lost minerals from sweating and avoid muscle cramps, we mixed one liter of water with an electrolyte-replenishing solution on a daily basis.
You should experiment with yourself on a shorter hike before making a decision on how much water to carry, as water consumption varies greatly with each person, the level of physical exertion and weather conditions.
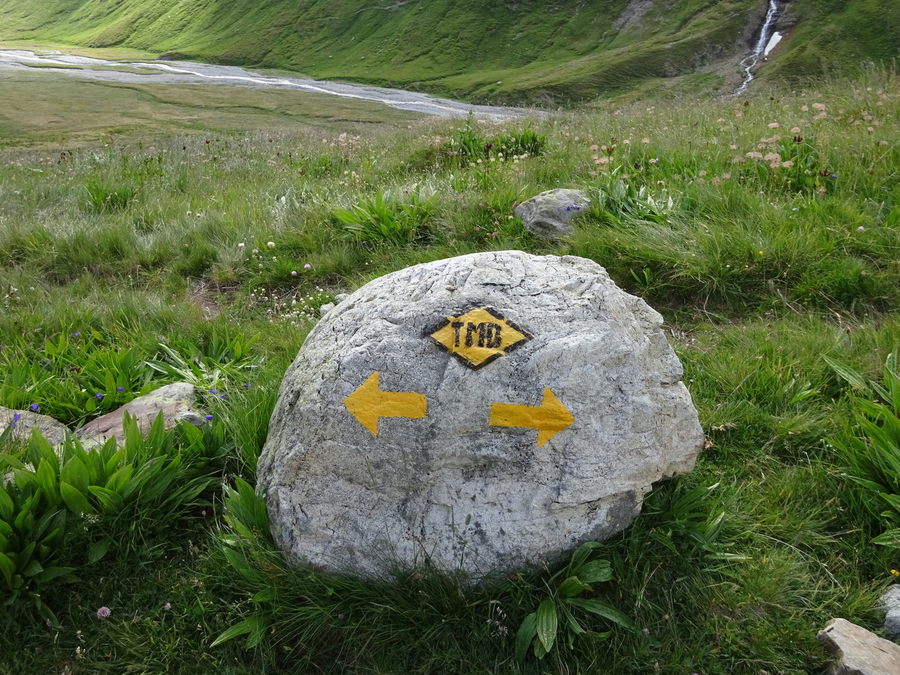
Counter-clockwise or clockwise direction
The guide presents the route both in counter-clockwise and clockwise directions. The most popular option is the former and it is true that if you decide to follow it, you will see mostly the same people on the trail and where you stay. This can be both a good and a bad thing, depending on what you want. We opted for counter-clockwise, mainly because it’s the most popular choice.
Regular routes or alternatives
One of the most important choices you will have to make is whether you will follow the regular, usually easier, routes between stages or the, much physically (but not technically) demanding, alternatives (“variantes”) that climb to higher altitudes and enjoy magnificent views. After picking the hardest and highest routes for all stages but one due to bad weather, we’d definitely recommend it if your fitness allows it.
Reaching the beginning
If you are doing the tour in a counter-clockwise direction, you will most probably begin at Les Houches. From Geneva airport we used the great AlpyBus mini-bus service to get to Les Houches in around 1.5 hours. Make sure you book with them online for both the outward and the return journey before setting out.
Breaking down into stages
The guide breaks down the tour into 11 stages (each lasting a day). With the exception of the last two days, we planned ours based on its recommendations:
Day 1: Les Houches - Col de Voza - Col de Tricot - Chalets de Miage - Chalets du Truc - Les Contamines-Montjoie
A demanding start right out of Les Houches with a tough ascent to Col de Voza. Then the way continues with another demanding ascent to Col de Tricot, a steep descent to Chalets de Miage and another tough but shorter ascent of Mont Truc until Chalets du Truc, before a final knee-trembling descent all the way to the village of Les Contamines-Montjoie.
Accommodation: Chalet Caf des Contamines — Run by Club Alpin Francais, you may be eligible for a discount if you are a member of an alpine club (even from another country) and show your membership card.
Day 2: Les Contamines-Montjoie - Col de la Croix du Bonhomme - Col des Fours - Tete Nord des Fours - Refuge des Mottets
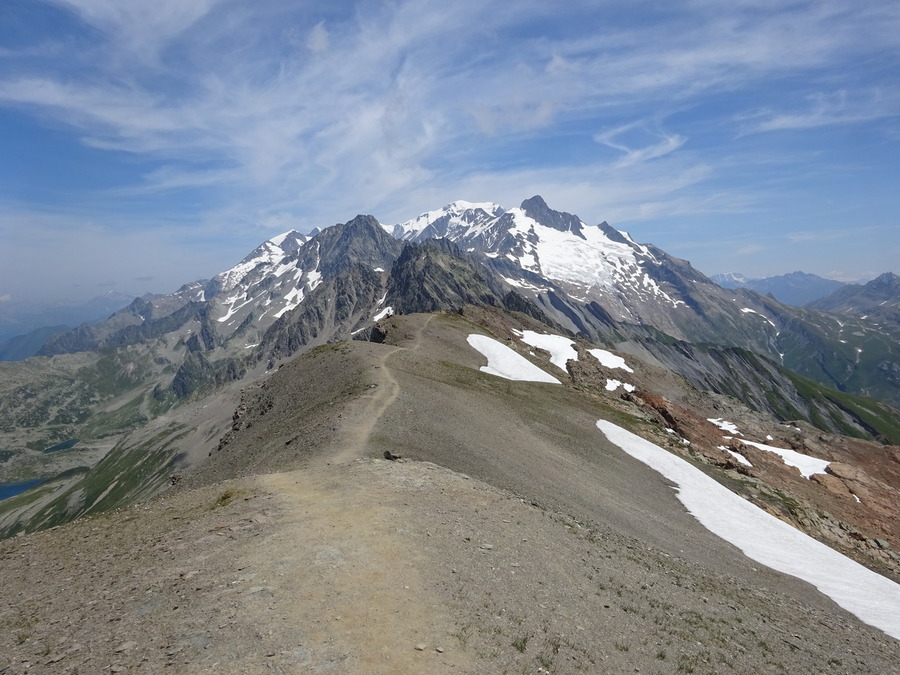
A demanding start with a tough ascent until Col de la Croix du Bonhomme. The route then visits Col des Fours and later the summit of Tete Nord des Fours (2756 m) which was our highest point in the tour and offered one of the best views. Like the day before, the final descent to Refuge des Mottets is long and challenging.
Accommodation: Refuge des Mottets — Opt for the smaller rooms which are great. The dormitory looks old and gross!
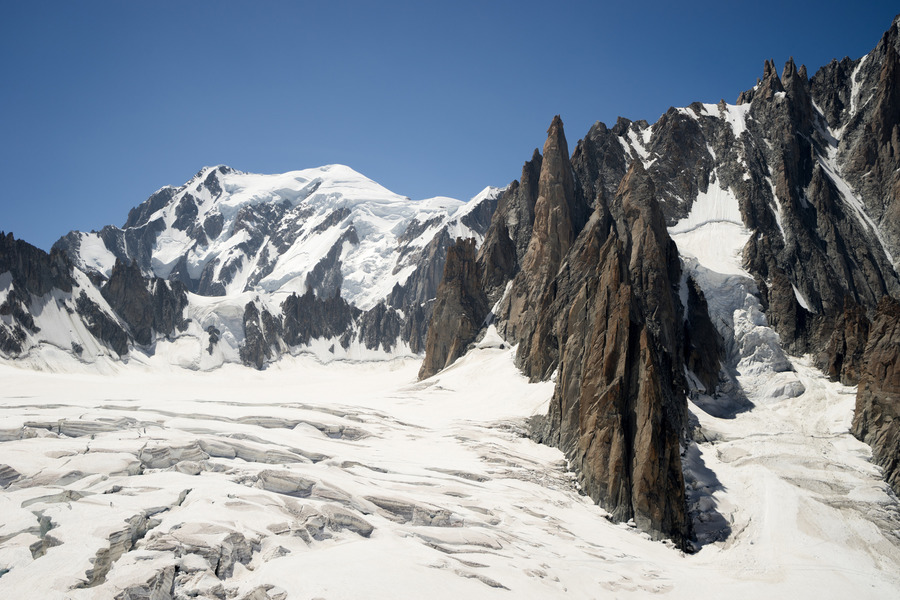
Day 3: Refuge des Mottets - Col de la Seigne - Rifugio Elisabetta - Rifugio Maison Vieille - Rifugio Monte Bianco - Courmayeur
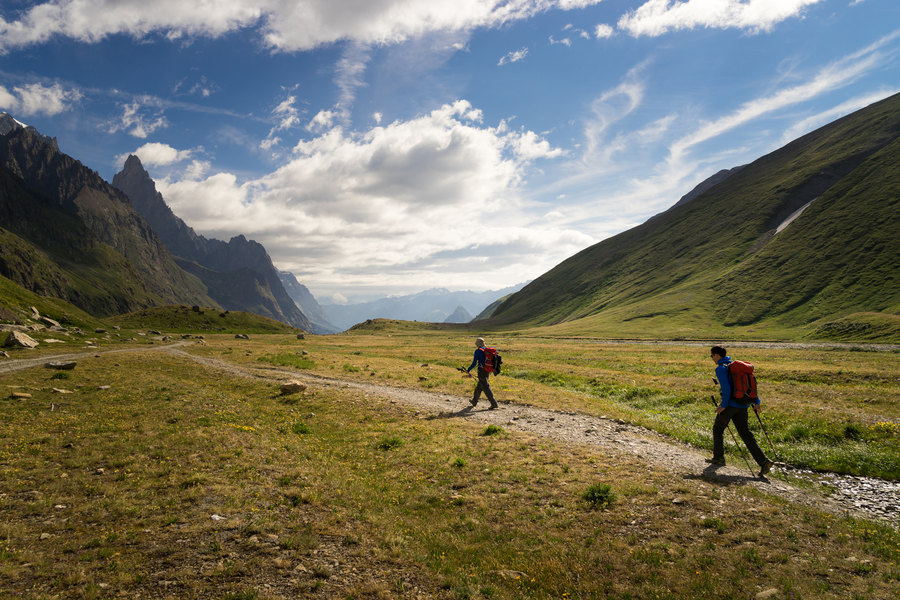
After an initial continuous ascent to Col de la Seigne the route crosses the French-Italian borders and enters Italy. A relatively easy descent follows to the beautiful valley of Val Veni. The setting here is otherworldly and brings you memories of landscapes like those seen in the Lord of the Rings movies. The huge dark triangular rock spire is Aiguille Noire de Peuterey.
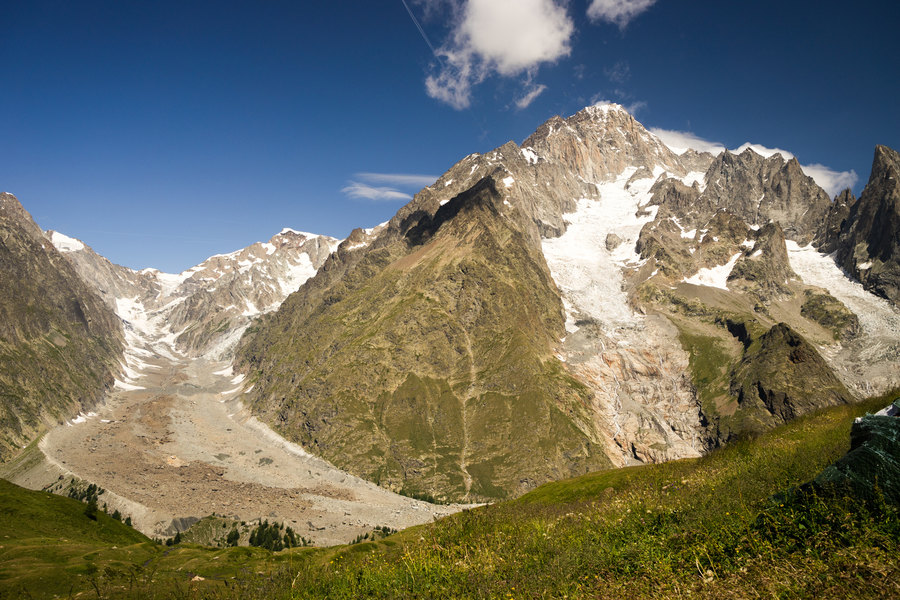
After passing Rifugio Elisabetta and reaching the lake of Lac Combal through an ugly dirt road, the route turns right before a bridge to go through yet another tough ascent. Once on the high point, the view is simply mind-blowing with a vantage point to five glaciers: Blanche, Miage, Bruillard, Freney and Brenva. Alas, it is also depressing since the recession of some of them (especially Miage) is dramatic; the biggest we saw in the whole tour.
The route continues for a while along the same elevation (always offering a great view on the left) and eventually starts to descend until Rifugio Maison Vieille. From there, instead of heading straight to Courmayeur through Dolonne, it heads northeast to Rifugio Monte Bianco which gets you closer to the mountain and the glaciers. Eventually, it reaches Courmayeur by rounding Mont Chetif, going through asphalt road at times.
At 25 km, this is the longest we hiked in a day. Together with day 5, it offers undoubtedly one of the best views in the tour.
Accommodation: Hotel Tavernier — Clean, good breakfast, cheap and centrally located. Wireless access is only available in the reception.
Day 4: Rest day in Courmayeur
One of the best decisions we made. The rest day in Courmayeur was invaluable to recuperate after three challenging days right from the start. It also gave us the opportunity to enjoy the comforts of a hotel, wash our clothes, eat the best breakfast we had in the tour, try Italian pizza and “gelato” and, of course, visit Aiguille du Midi with the cable cars.
To reach the cable cars, you can take the hourly bus (2 € with return; July 2015) from Courmayeur center that will take you to La Palud at the base of the cable car station. From there you take two cable cars until Pointe Helbronner (45 € with return; July 2015) and then a gondola lift until Aiguille du Midi (39 € with return; July 2015). Pretty expensive, but it’s definitely worth it!
Note that Courmayeur stands at 1224 m and Aiguille du Midi at 3842 m. That’s a gain of 2618 meters in a matter of a few hours, so take it easy and in the first signs of altitude sickness, don’t hesitate to retreat to a lower altitude. We felt that spending some time in each station while going up didn’t make any difference in our acclimatization.
Accommodation: Hotel Tavernier — See day 3.
Day 5: Courmayeur - Rifugio Bertone - Tete de la Tronche - Col Sapin - Pas Entre Deus Sauts - Rifugio Walter Bonatti
Out of Courmayeur begins a tough ascent that climbs Mont de la Saxe. Shortly after passing Rifugio Bertone and gaining the ridge, the angle eases and then a more gentle path follows until the summit of Tete de la Tronche (2584 m). While crossing the ridge you have an unbelievable panoramic view of the south side of Mont Blanc, and in particular of the Grandes Jorasses.
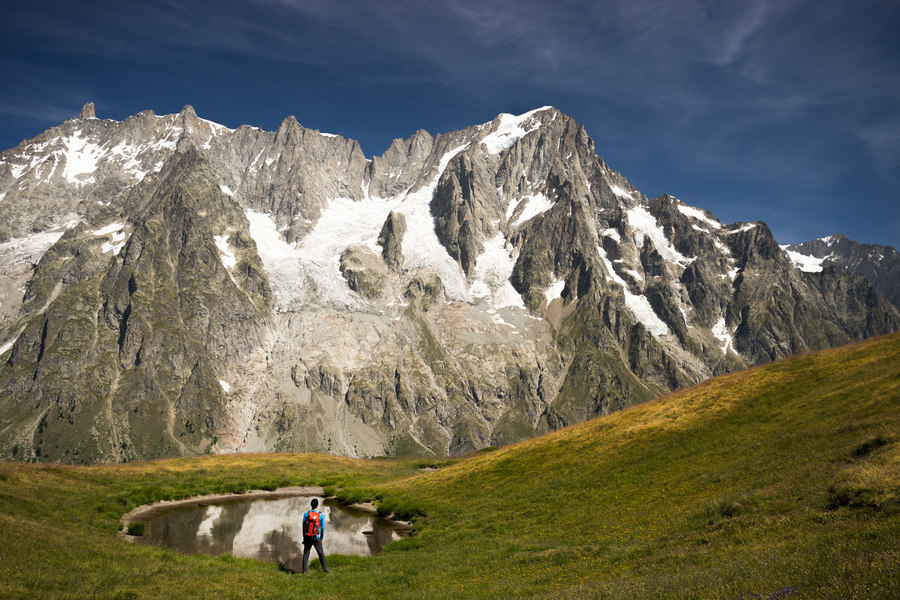
From Tete de la Tronche a steep descent follows until Col Sapin and then another ascent to Pas Entre Deus Sauts (2524 m) before the final descent to the valley of Vallon de Malatra, again with an amazing view to the Grandes Jorasses, and eventually Rifugio Walter Bonatti.
Not long but the greatest ascent we did in a single day during the tour. Also, the day with the most mind-blowing views by far. The Italian side of Mont Blanc is simply gorgeous.
Accommodation: Rifugio Walter Bonatti — The refuge with the best facilities and views we have ever seen. The only downside (unsurprisingly) is the scarcity of hot water (you get a coin for that but it may last for only a few seconds). Since this is a refuge, you may be eligible for a discount if you are a member of an alpine club (even from another country) and show your membership card.
Day 6: Rifugio Walter Bonatti - Rifugio Elena - Grand Col Ferret - La Peule - La Fouly
From Rifugio Walter Bonatti an easy hike with a short steep descent at the end leads you to the valley of Val Ferret. From there a surprisingly hard climb follows, passing from Rifugio Elena, until Grand Col Ferret at the Italian-Swiss borders.
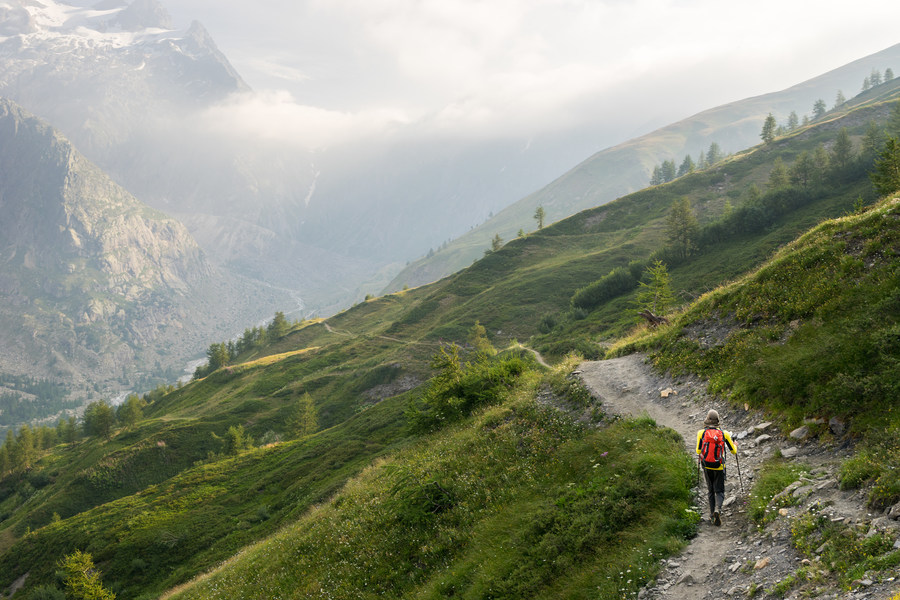
Having entered Switzerland, we found that the scenery becomes a bit less interesting and remains like this until reaching La Fouly which enjoys a nice view to the east side of Mont Blanc.
Accommodation: Auberge des Glaciers — This is more of a restaurant with some beds and spartan facilities. The bed sheets could have been cleaner. The food was quite nice.
Day 7: La Fouly - Praz de Fort - Les Arlaches - Issert - Champex d'en Haut
One of the easiest and less interesting days of the tour with the smallest ascent, smallest descent and nothing particular in terms of views. Consider joining it with another day if your fitness and planning allows it.
Accommodation: Gite Bon Abri — Clean, good facilities and the food was OK. Since the rooms are stuffed with beds to fit as many people as possible, there is no space to bring your pack, so the owner asks you to leave it downstairs and carry essentials in a plastic bag! Even though its setting in forests is quite nice, it’s too far away from Champex to visit.
Day 8: Champex d'en Haut - Bovine - Col de la Forclaz
This is the regular route we did due to expected thunderstorms at noon time. Sadly, the exact opposite happened and we were caught up high on the mountain in the middle of a thunderstorm with hail, which was an interesting experience to say the least. It also got us soaking wet. Amazingly enough, it was the only day it rained while we hiked in the whole tour.
This is the shortest distance and maybe the easiest hike we did on the tour. Again, being on the Swiss side, the views are rather unimpressive but, at least, there is an abundance of forests. Consider joining it with the previous or the next day (e.g. until Col de Balme, staying at Refuge de la Balme).
Accommodation: Hotel de la Forclaz — Good food, old building and the facilities are simply OK. The location is really in the middle of nowhere, so if you make the mistake of arriving early, good luck!
Day 9: Col de la Forclaz - Refuge les Grands - Col de Balme - Aiguillette des Posettes - Tre le Champ
With this route, we are finally entering France again later in the day!
Already from the beginning, the setting is interesting with a steep but relatively small ascent until Refuge les Grands which enjoys a nice and relatively close view to the Trient and Grands glaciers.
From there, the way to Col de Balme is not very challenging in terms of height gain/loss. However, the terrain at the beginning is rocky in some places and requires slightly delicate moves.
At Col de Balme we cross the Swiss-French borders and after a short descent, we make another steep but short climb to Aiguillette des Posettes before a final and steep descent to Tre le Champ which looks more like a settlement than a village.
Accommodation: Gite la Boerne — The food is OK but the facilities are lacking and the rooms are small, non-ventilated (no windows) and claustrophobic to the point of inhumanity. Avoid it if possible.
Day 10: Tre le Champ - Aiguillette d'Argentiere - Tete Aux Vents - Refuge de la Flegere - Planpraz - Chamonix
Starting from Tre le Champ, a steep ascent will lead you to Tete Aux Vents through a series of easy (in fine weather) ladders, passing from Aiguillette d'Argentiere. From there you have the option of visiting Lac Blanc, which must be one of the most beautiful settings of the whole tour. Sadly, we had to pass since the weather looked ominous in that direction. Instead, we continued on the regular route to Refuge de la Flegere.
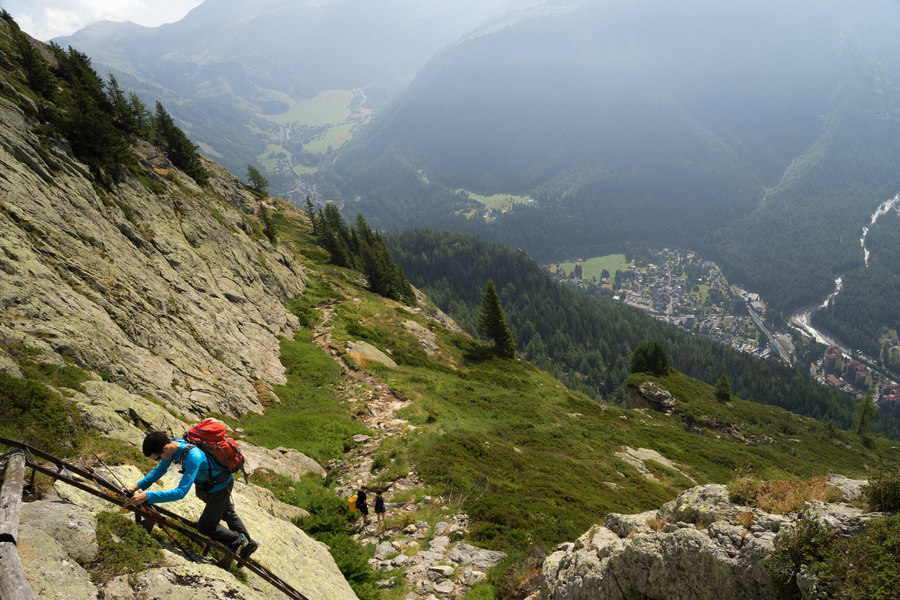
A tour of Mont Blanc wouldn’t be complete without visiting Chamonix. That’s what we thought and given that we felt in a pretty good shape, we skipped our stay to Refuge de la Flegere (which stands above Chamonix) and continued until Planpraz. From there, we couldn’t find a place to buy tickets for the cable car, so we decided to consult the map and follow the steep descent to Chamonix, which was our second greatest descent in the tour.
The section from Refuge de la Flegere until Planpraz was by far the busiest we had ever seen in the whole tour. It seems that the easy access with the cable car from Chamonix makes it a popular destination.
Accommodation: Hotel Alpina Chamonix — A decent choice, not very expensive, centrally located.
Day 11: Chamonix - Chalet de Cerro - Point de Vue - Glacier Bossons - Les Bossons - Les Houches
Since we left the official tour the day before to visit Chamonix, there was no way we were going to climb back up to Planpraz or take the cable car. So we decided to follow the advice of local Greek mountain guide Nikos Hadjis and climb on the Mont Blanc itself to Point de Vue which offers a closer view to the Bossons glacier.
After consulting the map and GPS many times we managed to reach Point de Vue but found the glacier to be too far, so we continued climbing up the steep, unmarked slope through the woods until we ended up a few meters below the glacier. Looking at the satellite image later, it was probably not the safest thing to have done as we were right below and in the middle of the huge hanging glacier during the warmest hours of the day.
After leaving the glacier, we decided to go down to the village of Les Bossons, cross the river of L'Arve and follow the dirt road along the river’s coast to Les Houches. This turned out to be a very good idea as the forest around the river offered shade that protected us from the intense heat of the midday sun.
Accommodation: Gite Michel Fagot — We also stayed there the day before starting the tour. A decent choice with pretty good food. Make sure you try a “tarte” with strawberries from the bakery on the road above.
Assorted tips
Planning
- The tour is a huge undertaking, not only in terms of being physically challenging but also when it comes to planning and logistics. Be patient.
- The first days are undoubtedly hard in terms of distance and height gain/loss, but one other reason is that your body is not used to the punishment. As the days go by, you will find that your body adapts (provided that you don’t injure yourself), so take this into account when planning what you will be hiking later in the tour. Before doing the tour, a 15 km hike seemed too much for us. After half of the tour, 15 km seemed so little that we found ourselves arriving too early in our destination and getting bored.
- Try to minimize your stay in Swiss territory. The views are not that impressive compared to the French and Italian sides, the paths are sometimes too far away from the mountain and everything is more expensive.
- We found that the suggested times in the guide were more than enough for us. We usually completed a much longer hike and (even counting in the breaks) our times were much less from what the guide suggested. Of course, this varies from person to person, but it’s still a good idea to compare your times with the guide. This will give you a sense on how you’re doing and will help you calculate how long each hike will take you on later days.
Accommodation
- Breakfast is usually served at 7 AM and dinner at 7 PM. We usually slept at around 10 PM and woke at 6 AM.
- Dinner is almost always a 3 course meal: salad or soup, main course and desert. That may not be the case for hotels since we only had breakfast there.
- Apart from Rifugio Walter Bonatti, all accommodations have sufficient hot water.
- Don’t expect very clean bed sheets and pillows as they are not changed on a daily basis. Bring your own sleeping bag liner (mummy style will make sure your head does not come in contact with the pillow). All accommodations offer blankets, so you don’t need to carry a sleeping bag.
- Bring ear plugs! Many people are tired after hiking for the whole day and snore heavily. An alternative is to listen to relaxing music but that may not be enough if you sleep next to a person that is snoring.
- Apart from hotels, all accommodations have a place for hanging washed clothes outside in the sun and air to dry. For hotels, we found a 4-5 meter long accessory cord to be useful.
- Arrange for a pass time like playing cards or reading a book. You may need it on days that you arrive too early at your destination.
- Some accommodations may not offer hand washing soap in the WC, so have some with you.
Clothing and relevant equipment
Some important items we carried per person (non-exhaustive list):
- 3 pairs of synthetic (polyester-based) underwear that we washed.
- 3 synthetic long-sleeve shirts with UPF-rated sun protection (to avoid placing sunscreen on the arms) and a front half-zip (to help regulate heat) that we washed.
- 1 pair of synthetic and slightly stretchy hiking convertible pants with zip-off legs. This makes it possible to remove the lower legs to wash them or hike in shorts if you find the heat to be unbearable.
- 1 pair of simple, lightweight pants to wear at accommodations while waiting for your hiking pants to dry.
- 1 lightweight packable wind jacket.
- 1 lightweight packable rain jacket (used once).
- 1 hat with a large bill, a neck flap and UPF-rated sun protection.
- 1 pair of sun glasses with good coverage on the sides. Ideally, they should have light-sensitive lenses to adjust the amount of light passing through.
- Sunscreen for the face and lips. If you are hiking for the whole day and for many days straight, wearing a hat is not enough as light reflected from surfaces will eventually burn your face and lips.
- 3 pairs of technical hiking socks that we washed. They should dry relatively fast, assist ventilation and have cushioning on the toes, mid-foot and heel to prevent hot spots and blisters.
- 1 pair of non-waterproof trail running shoes which are lighter, more comfortable, more precise and more breathable than regular waterproof hiking boots.
- 1 pair of lightweight beach sandals to wear inside. Most accommodations will offer sandals, but we opted to carry our own for hygienic reasons.
- 1 pair of robust trekking poles to help with the occasional slip, prevent sprained ankles, assist in climbing and take load off of knees during steep and hard descents. Consider taking a pair of leather gloves (half-finger should be fine) to prevent irritation of your palms’ skin from friction.
- 1 large heavy-duty plastic garbage bag to protect the contents of your pack from rain water (with 11 days of hiking, there will be rain).
- 2 bottles of Care Plus Clean Bio Soap, a concentrated biodegradable multifunctional soap for washing hands, skin, hair and clothes. By having a single soap for everything, you reduce the volume of soap containers you carry and simplify your daily routine.
Stuff we carried “just in case” but didn’t use:
- Waterproof pants
- Lightweight down jacket
- Hat and gloves
- Headlamp with batteries
- First aid kit with space blanket and whistle
Electronic equipment and connectivity
- There is wireless reception everywhere except in Refuge des Mottets and Rifugio Walter Bonatti (July 2015). Sadly, even in places that have reception, there are too many people connecting at the same time (especially later in the day) so you may get intermittent connectivity issues.
- There is cell reception everywhere except in Refuge des Mottets (July 2015).
- You should have enough opportunities to charge your devices in the various accommodations. The challenging part, sometimes, is to find a free socket, so it pays to bring a power strip with you. Make sure you also bring a socket adapter in case you need one.
- Expect a lot of dust on the trails which is not the best thing for exposed electronic equipment like digital cameras and GPS devices. We had a cheap plastic dust blower to clean them at the end of the day.
- A smartphone is indispensable for making phone calls, checking the weather, finding information, booking hotels, taking photos, playing games and getting informed about whether your country has gone bankrupt.
Found this useful? Subscribe for more!
Disclaimer
No guarantee is given about the correctness or accuracy of the information contained in this post. Anything that happens to you while trusting a part or all of the information contained in this post is your sole responsibility.
Dimitris Koukis and Dimitris Manargias contributed to this post.