Trekking the Alta Via 1 in the Dolomites
Disclaimer
No guarantee is given about the correctness or accuracy of the information contained in this post. Anything that happens to you while trusting a part or all of the information contained in this post is your sole responsibility.
After the Tour du Mont Blanc in 2015 and our Pindus Trek (Greek) in 2016, for 2019 we decided to go for the Alta Via 1 in the Dolomites, Italy.
This post details all the necessary information on resources and navigation, transportation, accomodation, equipment and the trek itself. It’s what I wished we had when we set out.
If you are only interested in the trek, skip to the trip report.
A note on out-of-date information
All information presented in this post is accurate for July 2019. As time goes by, some of it may go out of date. If you find something that needs updating, please let me know.
Resources and navigation
Guide
We based our research and planning on the relevant Trekking in the Dolomites Cicerone guide, which covers Alta Via 1 and 2 in detail and 3-6 in outline. We bought both a paperback version to use before the trek while planning and an ebook (ePub) version to use in our smartphones while on the trek to save weight.
Maps
Tabacco is the maker of 1:25000 topographic maps in the wider area of the Dolomites. As with the guide, we decided to install the relevant smartphone app (Android, iPhone) and buy the digital maps for ease of use and to save weight.
The digital maps are sold separately in squares and the ones for Alta Via 1 are 001E through 001J (6 squares) and E02E through E02J (6 squares) forming a 2x6 square area. The total cost is a whopping €27.48 (€2.29/square).
If you prefer to use regular paper maps, the ones you need to buy (according to the guide) are 031, 03 and 025. Note that paper maps are usually not waterproof and tear quite easily.
Just like on the TMB, the whole route was very well signposted and we didn’t have to use the maps at all while on the trek. The few times we used them, it was in the refuges to get a sense of the next day’s route and to explore possible alternatives during our last day of rainy weather (more on that in the trip report later).
GPS
Just like on the TMB, we had each day’s route loaded as a track on our smartphones, which was very convenient and helped us the few times we were unsure where to go and signposts were missing. It also saves weight because you don’t have to carry an extra GPS device and batteries.
I highly recommend using Wikiloc (Android, iPhone). Apart from supporting OpenStreetMap offline maps, it will also alert you if you veer off-course.
You can download a GPX track for each day in the trip report that follows.
A smartphone for everything
If you do go this route and use your smartphone to store the guide, maps and GPS tracks, you have a single point of failure. If your smartphone dies or is out of battery, you lose everything. To mitigate this, load all resources in a second smartphone, carry an external battery pack with a cable and use some plastic smartphone waterproof case (make sure pressing on the screen through the plastic works).
Language
The area of South Tyrol has both Italian and German as official languages. Speaking neither of them, we didn’t have any problems communicating in English and found that almost everyone knows at least a few basic words, making communication possible (with a little patience at times). In the rare cases that you need translation, you can install the Google Translate app (Android, iPhone) in your smartphone and download the Italian dictionary for offline use.
Money
Italy uses the Euro and coming from Greece, we found that to be very convenient. If you have a different currency, make sure you have exchanged enough cash to pay in the refuges because some of them do not accept debit/credit cards.
Keep in mind that some banks charge an exchange fee when using a debit/credit card abroad and/or if the charged amount is in a foreign currency.
Weather
Summer weather in the Dolomites is typical alpine weather with sunshine, moderate heat and occasional thunderstorms (usually at noon).
We went on the second half of July and during a rare heat wave, so we found the heat to be much worse than we anticipated (usually with no wind). And we come from Greece, which is more south and notorious for its summer heat. So make sure you take this into account (especially if you live in a cooler climate) and plan accordingly (clothing, water, sun protection).
High temperatures also cause humid air to rise in the morning hours, cooling and condensing into clouds that usually form afternoon thunderstorms. Out of the 6 days of hiking, we got only 1 clear day, 4 days with a clear morning and an afternoon thunderstorm and 1 rainy day.
That’s why it’s critical to consult the weather forecast on a regular basis. Set out early (8:00 the latest) and make sure you reach your destination by 14:00 (ideally) or 15:00 (the latest) when thunderstorms usually break out. Never walk in high and exposed sections like ridges and summits during a thunderstorm. Consult relevant material (books, emergency guidelines) on how to act when caught in a thunderstorm.
The October 2018 storm
In October 2018, the Italian Dolomites were hit by a devastating storm called Tempesta Vaia. Hurricane-force winds of up to 200 km/h caused widespread damage to villages, houses, roads, paths and there were several deaths. Millions of trees were leveled. As a result, some paths were closed. For more information, read this announcement and make sure the paths you intend to follow are open and maintained (paths in the Dolomites are numbered).
When to go
The hiking season lasts from mid-June when refuges open until the end of September. Go too early, though, and there may be considerable amounts of snow. A safe choice is July. August is said to be busier because many Europeans take time-off to go on vacations. On September, some of the refuges may be closed. We went on the last week of July.
Food and water
Since you have breakfast and dinner covered in the refuges (half-board or “mezza pensione” in Italian), you only need to take enough food to last you while hiking, plus a few hours until dinner.
Buying food from refuges is not always an option and they usually sell junk food, so we ended up carrying enough energy bars (made of fruits and nuts) for all of the days. The weight can be significant when you set out (1-2 kg), but as the days go by, your pack gets progressively lighter.
Avoid very salty, spicy or sweet food (you will consume more water), chocolate (it will melt) and airtight-sealed foods like strudels and croissants (they expand and consume valuable space due to the lower atmospheric pressure).
As for water, we carried around 2.5-3 liters per person for 6-8 hours of hiking and found it to be just right. But it really depends on the individual and the heat, so you have to figure out the right amount for you before setting out.
If you want to carry less, one option is to buy water bottles as you pass from refuges during the trek. Make sure you carry any empty plastic bottles with you and recycle them at the end of your trip.
What to carry
Please note that the following lists are non-exhaustive and you should bring everything else you deem necessary.
Clothing
- 3 pairs of synthetic (polyester-based) underwear that you hand-wash
- 3 synthetic long-sleeve shirts with UPF-rated sun protection (to avoid placing sunscreen on the arms) and a front half-zip (to help regulate heat) that you hand-wash
- Lightweight (100-200) insulating fleece
- Synthetic and slightly stretchy hiking pants with zip-off legs. This makes it possible to remove the lower legs to wash them and to open the zippers or wear shorts during intense heat.
- Lightweight shorts to wear at refuges
- Lightweight packable rain jacket
- Lightweight rain overpants
- Brimmed hat with a neck flap
- 3 pairs of technical hiking socks that you hand-wash. They should dry relatively fast, assist ventilation and have cushioning on the toes, mid-foot and heel to prevent hot spots and blisters.
- Lightweight beanie cap
- Lightweight gloves
- Sun glasses
- Non-waterproof trail running shoes which are lighter, more comfortable, more precise and more breathable than regular waterproof hiking boots (they also dry faster if they get wet)
- Lightweight plastic beach sandals to wear in refuges and when taking a shower
Equipment and stuff
- 40-45 L lightweight pack (when loaded, its weight should ideally not exceed 10 kg)
- Robust aluminum trekking poles to help with the occasional slip, prevent sprained ankles, assist in climbing and take load off of knees during steep and hard descents
- Several plastic, transparent, re-sealable ziploc bags of different sizes to protect the contents of your pack from rainwater and group assorted items
- Lightweight and fast-drying synthetic (microfiber) face and body towels
- Sleeping bag liner (required in all refuges!)
- Ear plugs to block out snoring!
- 3.5-4 m long, 3-4 mm thick accessory cord and enough clothespins for hanging clothes to dry. We used this almost every day and it will be your only option if it’s raining outside. Or you can buy the Sea to Summit Clothesline.
- Smartphone, sports watch, battery pack, USB power plug adapter, charging cables, chargers (and a plug converter if you need one)
- Waterproof headlamp with fully-charged batteries. Make sure it cannot accidently turn on when pressed inside your pack (some have a lock mode).
- At least 100 mL of concentrated, biodegradable, multifunctional, outdoors liquid soap for washing hands (some refuges don’t offer a hand soap), skin, hair, face and clothes
- Sunscreen for the face and lips. Wearing a hat is not enough as light reflected from rocks and snow will eventually burn your face and lips.
- First aid kit with emergency medication, space blanket, whistle
- Vitamins, Gehwol foot cream (for hot spots in feet), Compeed patches, electrolyte powder sacks or pills
- Toiletries
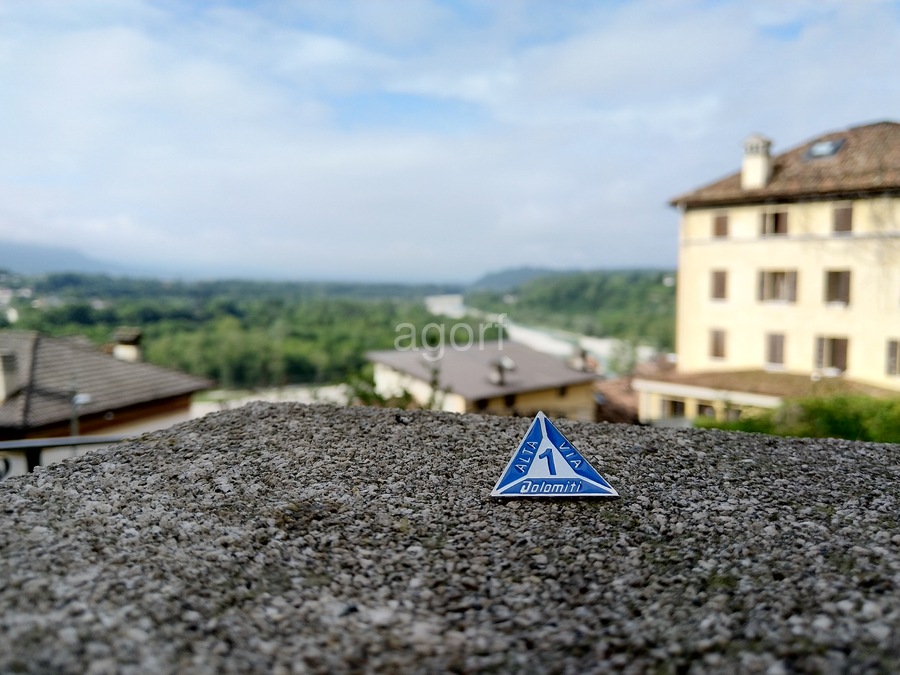
Alta Via 1 lapel pin (or “badge”)
Bring with you a piece of A4 paper (making sure it stays dry) and stamp it (“timbro” in Italian) in the refuges you pass and/or stay at. At the conclusion of your trek, you can present it at the Belluno tourist office to get your free Alta Via 1 lapel pin!
Transportation
Getting to the trailhead
Assuming you fly to Venice:
Venice Airport to Cortina d'Ampezzo
From the Venice Airport take the Cortina Express bus to Cortina d'Ampezzo. The trip takes a little over 2 hours.
The bus stop is across the Tamoil oil station (July 2019). Make sure you are on time because the bus makes a short stop and there are no signs to let you know you’re waiting in the right place!
We booked tickets online one month ahead and it cost us €18 per person. It’s possible to change your booking online for a €5 fee per person.
Cortina d'Ampezzo to Dobbiaco (Toblach)
The Cortina Express bus drops you at the bus station in Cortina. From there, take the SAD bus line 445 to Dobbiaco. Tickets are issued onboard and cost €5 per person (July 2019). The trip takes about 50 minutes and has great views (even to the Tre Cime di Lavaredo for some brief moments). To be near the trailhead, we slept in a hotel in Dobbiaco.
Dobbiaco to Lago di Braies (Pragser Wildsee)
Take the SAD bus line 442 to Lago di Braies. Tickets are issued onboard and cost €5 per person (July 2019). Since the bus is usually packed, you’ll probably want to go to the bus station if you want to have a chance of finding a seat. The trip takes about 30 minutes.
Returning
La Pissa to Belluno
The trek traditionally ends at the La Pissa bus stop outside of Belluno.
To avoid an incoming storm on the last day, we had to head in the opposite direction to Forno di Zoldo. Thus, we never had the chance to take the bus and, sadly, I have no information to share.
You can read more in the trip report.
Belluno to Venice
From the train station we took the Trenitalia train line 5640 to Treviso Centrale and then line 11027 to Venice and Stazione di Venezia Santa Lucia for some brief tourism. The trip takes a little over 2 hours.
We booked tickets online a few weeks ahead and it cost us €8.55 per person (July 2019). It’s possible to change your booking via the Trenitalia smartphone app (Android, iPhone) for free.
Venice to Venice Airport
From Venice and Piazzale Roma we took the bus line 5 to the airport. Beware that the bus is usually packed and it’s not easy to find a seat. Tickes are issued in nearby booths and cost €8 per person (July 2019). The trip takes about 30 minutes.
Accomodation in refuges
We hiked for 6 days and slept 2 nights in hotels (arrival, departure) and 5 nights in refuges. Since Alta Via 1 is a very popular destination, it’s wise to book as early as possible i.e. January or February (the latest).
Breakfast in refuges is usually served at 7:00 and dinner at 19:00. Lights go out at 22:00 and we woke at 6:00. We were on the trailhead at 8:00.
A detailed review of all the refuges we stayed at follows:
Day 1: Rifugio Lavarella (2042 m)
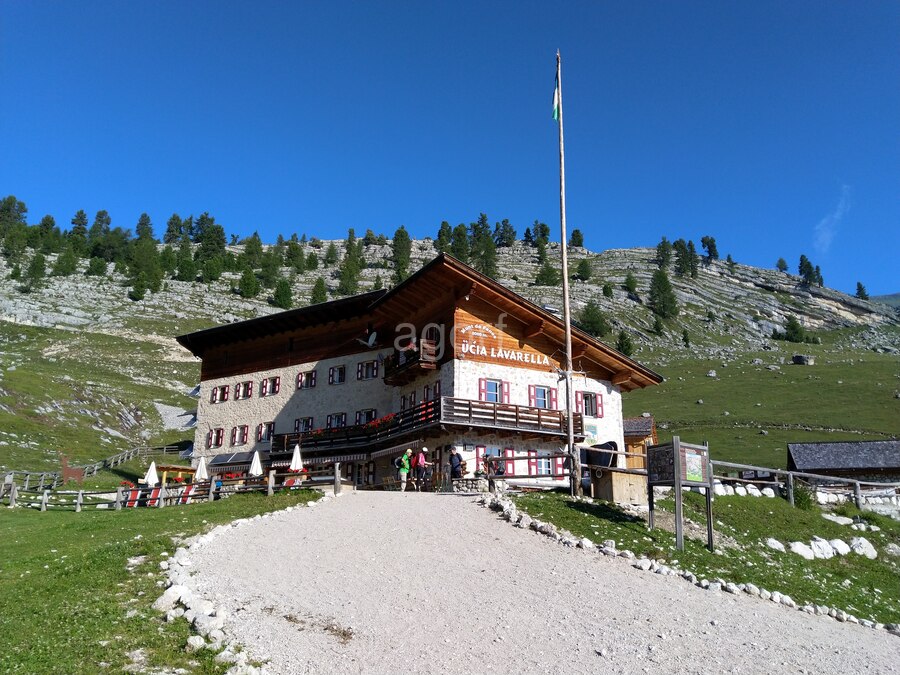
- Calm, idyllic place with streams, cows (and some mosquitoes/flies)
- Friendly staff
- €44/person with breakfast
- €20/person non-refundable deposit
- 7 person dormitory
- Clean
- Unlimited, free cold/hot water for shower
- Good dinner, ordered separately from a wide selection, a bit expensive
- Good breakfast
- Drinkable water
- Good WiFi access
- Power plug on every bed for charging
- Contact

Day 2: Rifugio Angelo Dibona (2037 m)
- Enjoys a magnificent view to Croda da Lago and Lastoi de Formin
- Less popular among hikers following the guide (it’s in the middle of stage 4)
- €56/person for half-board
- 6 person dormitory
- Clean
- Unlimited, free cold/hot water for shower
- OK dinner
- Poor breakfast
- Drinkable water
- Good WiFi access
- USB power plug on every bed for charging
- Contact
- Google Maps
- rifugiodibona@gmail.com (very late to respond!)
- tel:+390436860294
Day 3: Rifugio Città di Fiume (1918 m)
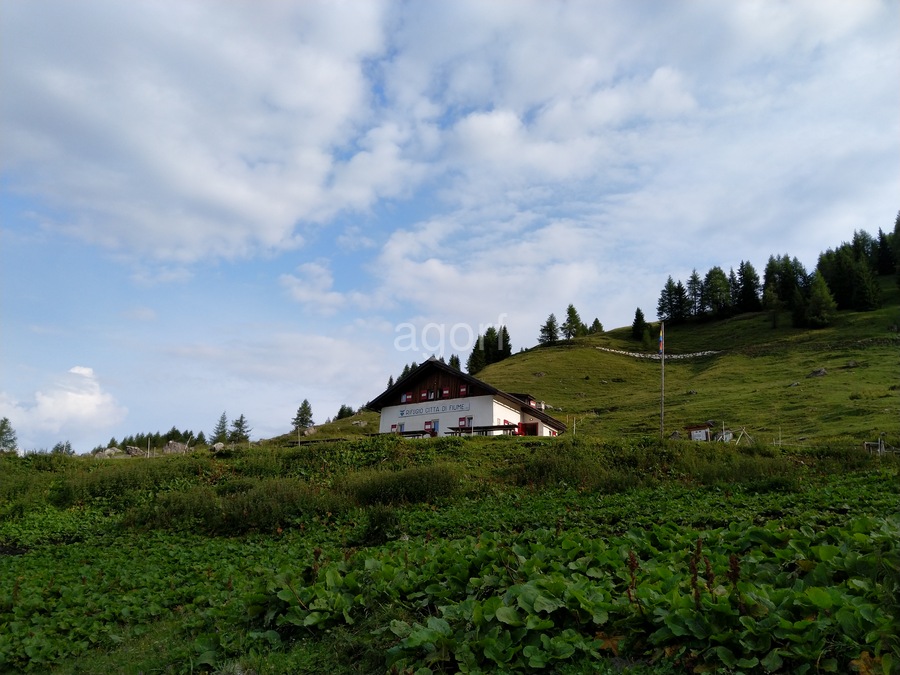
- Enjoys a magnificent, close-up view of mount Pelmo
- Calm, idyllic place with cows (and some flies)
- €55/person for half-board
- €20/person non-refundable deposit
- 5 person, small dormitory
- Clean
- Unlimited, free cold water for shower. Hot water tokens cost €3.5 for 4 minutes (cannot be paused).
- OK dinner
- OK breakfast
- Non-drinkable water! 1.5 L water bottle costs €2.5
- Good WiFi access
- One power plug per dormitory and one power strip outside the showers
- Contact
Day 4: Rifugio Mario Vazzoler (1714 m)
- Enjoys a magnificent and close-up view to Torre Venezia and Torre Trieste
- Calm, idyllic place among towering peaks
- €59/person for half-board (payments in cash only)
- 2 person, very small room with shaky bunk beds
- Not that clean
- Shower is not free (even cold water). Tokens cost €3 for 3 minutes (can be paused). A bit crowded due to the small space.
- OK dinner with small portions
- Poor breakfast
- Drinkable water
- No WiFi access (stops working once enough people connect) and no mobile carrier reception
- No power plugs in the room
- Contact
- Google Maps
- vazzoler@email.it (confirmation by email necessary 6 days before arrival)
- tel:+390437660008
Day 5: Rifugio Sommariva al Pramperet (1857 m)
- Built on a saddle between Cima di Pramper and Castello di Moschesin
- Friendly staff and a nice, rustic place
- €50/person for half-board (payments in cash only)
- 8 person dormitory
- Clean
- Unlimited cold/hot shower for €3 (no tokens needed)
- Good dinner
- Good breakfast
- Drinkable water
- Good WiFi access with some small interruptions
- Some power plugs in the dormitory near the entrance beds
- Contact
Trip report
Breakdown into days
For the TMB we followed the breakdown of the tour into stages (with one stage per day) as suggested in the relevant Cicerone guide. As a result, we found ourselves arriving early (as early as 12:00!) in our destination, which was usually in the middle of nowhere, without anything to do.
So for Alta Via 1, we decided to make some adjustments. We decided to have day hikes of about 20 kilometers with a maximum duration of 8 hours. This usually amounted to daily climbs of 1300-1500 meters. As our time was limited, we had to abandon the idea of climbing any nearby peaks suggested in the guide.
We, thus, came up with the following itinerary:
Day 1: Lago di Braies - Rifugio Biella - Rifugio Sennes - Rifugio Fodara Vedla - Rifugio Pederü - Rifugio Muntagnoles - Rifugio Lavarella
Guide stages: 1 and 2
Paths: 1, 6-23, 6A, 6A-24-27, 7, 7A, 7
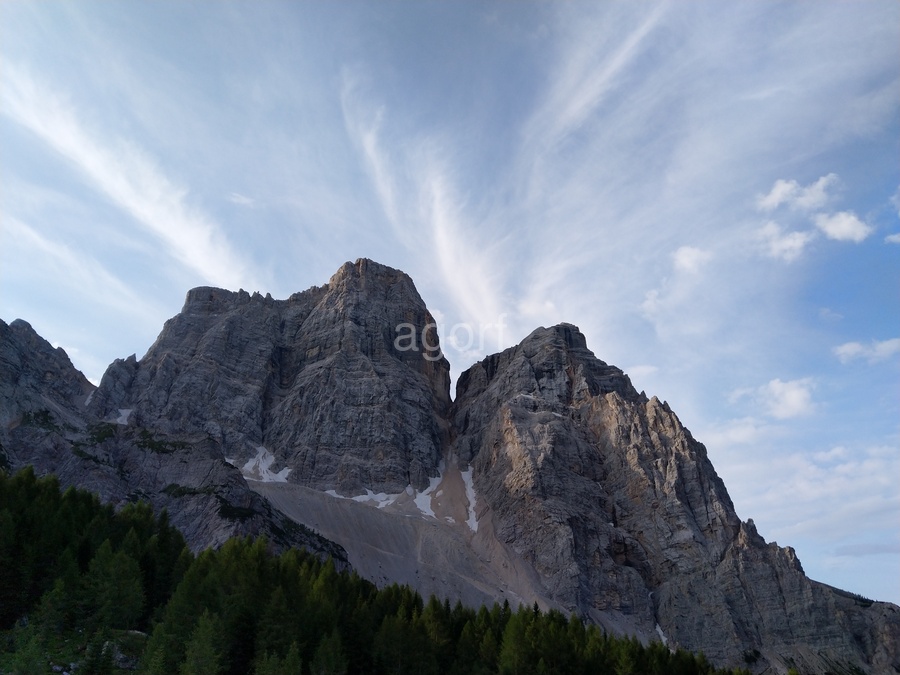
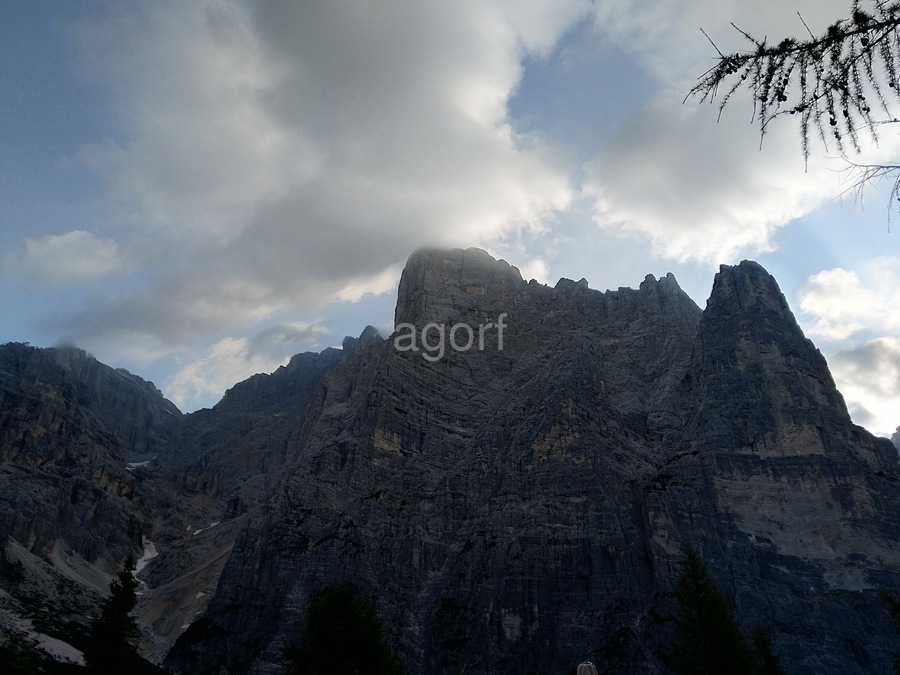
Setting out from the idyllic and touristy alpine lake of Lago di Braies, we make half a circle around the lake through beatiful woods. Either direction works: The guide goes to the right (counterclockwise), we went left (clockwise), passing below Grande and Piccolo Apostolo, yet enjoying mind-blowing views of Croda del Beco mirrored on the lake surface.
Once on the opposite point on the lake, we embark on a long and steep climb below Croda del Beco, initially through a scree river, gaining progressively magnificent views to the valley behind. The heat can be intense, so make sure you set out early!
At some point, we run into a steeper but relatively easy (subjective) section that is secured with via feratta cables.
Shortly thereafter, we arrive at a junction and head west towards Rifugio Biella.
We continue climbing, passing through an area which traps summer heat called “Forno” (oven), until Forcella Sora Forno.
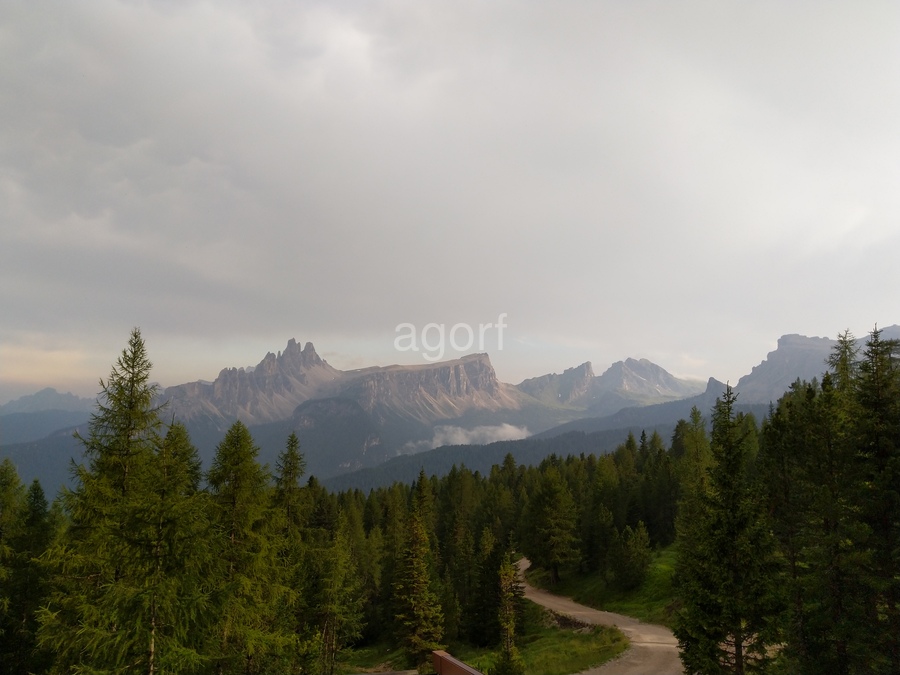
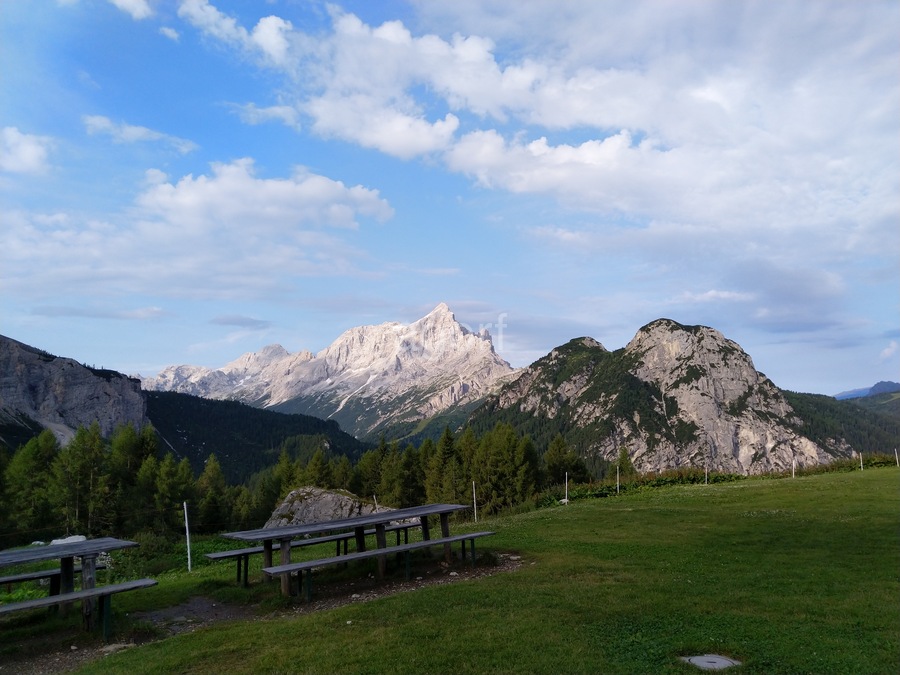
Once on the col and with Croda del Beco (Seekofel) towering on the right, we take a moment to take in the magnificent view to the heart of the Ampezzo Dolomites and their impressive peaks, and then make the short descent to the small and busy Rifugio Biella (Seekofelhütte).
From here, we continue descending on a dirt road and after almost 1 km cut through a path (6A) that progressively offers an impressive view of Sas dales Nü and Piz de Sant Antone, among others. The path ends when it joins another dirt road that leads us to Rifugio Sennes (Üćia de Senes).
We continue descending, heading south-east on what seems like a grassy airstrip, parallel to the dirt road (or just take the dirt road).
Right before the dirt road makes a sharp turn, we take a shortcut by following a path with a south-west direction until we join the dirt road again and continue descending, with Croda Rossa Pizora rising in the background, now heading south until Rifugio Fodara Vedla.
We now follow the dirt road, going west as a general direction. A steep descent follows from which we enjoy magnificent views of Cima Forca di Ferro (Furcia dai Fers), until we reach Rifugio Pederü (Üćia Pederü) at the Val dai Tamersc floor.
The remaining part will test our resolve. From Rifugio Pederü we head south and then south-west, climbing a long and steep path on the right side of Valun de Fanes and parallel to a dirt road below. The climb makes a short respite until crossing the dirt road, where it resumes.
We head west, essentially circling below Piz de Sant Antone, and then finally join the dirt road and head south until we pass from Üćia Pices Fanes and, shortly after, Üćia dles Muntagnoles.
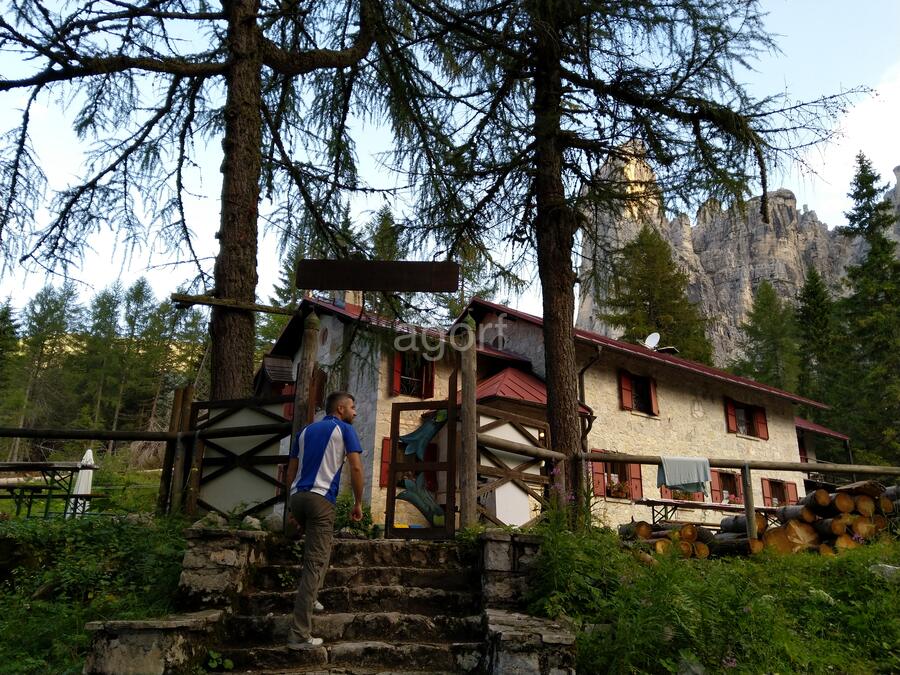
Here the road forks and (contrary to the guide which takes the left branch and ends up in Rifugio Fanes) we take the right branch which leads us to our final destination for the day, Rifugio Lavarella (Üćia Lavarella), situated between idyllic alpine pastures and streams.
Day 2: Rifugio Lavarella - Malga Fanes Grande - Forcella di Lech - Lech de Lagacio - Forcella Lagazuoi - Rifugio Angelo Dibona
Guide stages: 3 and 4 (part)
Paths: 11A, 11, 20B, 20, 401, 401-402, 402, 404, 403
Setting out from Rifugio Lavarella, we cross some streams and alpine pastures and start ascending, initially through forest and then on a dirt road, past lake Limo.
Still on the dirt road, we start descending until Rifugio Malga Fanes Grande and then continue for quite a while on the undulating dirt road.
At some point between the Piza Nord and Piz Taibun peaks, the dirt road intersects an ascending trail on the left which we take.
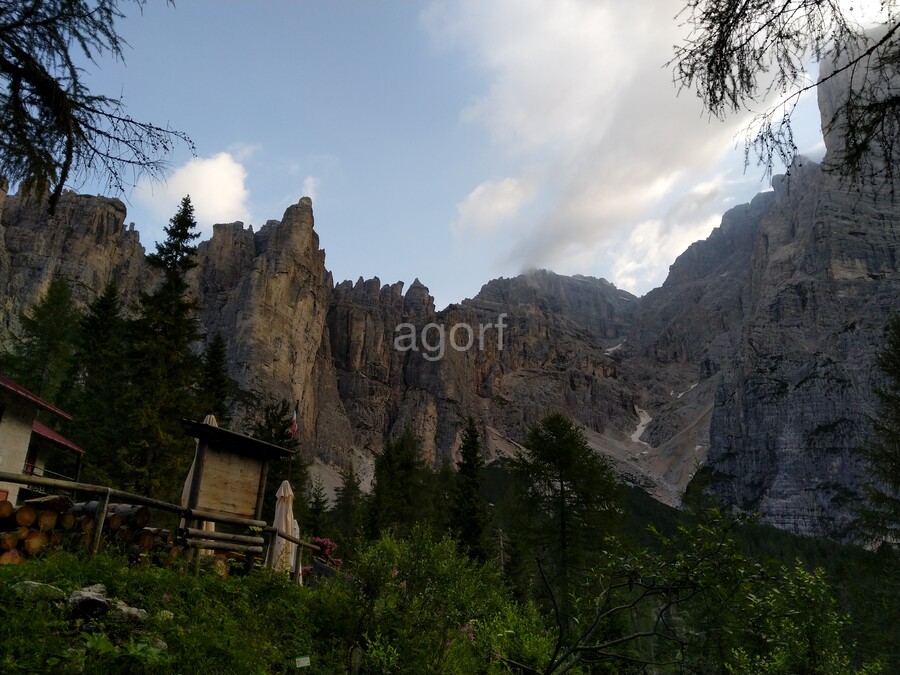
Through a well-trodden path we make a strenous climb until the highest point, an impressive col named Forcella di Lech, with a magnificent view to lake Lech de Lagacio.
From there, we climb down steep scree trails and slightly-exposed sections until reaching the bottom of the rock-strewn valley floor.
Then we begin another arduous climb until Forcella Lagazuoi below the refuge with the same name. It’s not very steep, but it is long and pretty demanding during intense heat.
After the col, we head east and through a series of more cols start the long descent (with a minor in-between climb) to Rifugio Angelo Dibona, all the while enjoying magnificent vistas to the massive Tofana de Rozes, surely one of the most impressive views of the whole trek.
Day 3: Rifugio Angelo Dibona - Lago de Federa - Rifugio Croda da Lago - Forcella Rossa - Forcella Ambrizzola - Forcella Col Duro - Forcella de Col Roan - Forcella Roan - Rifugio Città di Fiume (variante)
Guide stages: 4 (remainder) and 5
Paths: 442, 439, 437, 434, 436, 458, 467
For this day we decided to take an alternative route (variante) to get to Rifugio Città di Fiume. Thus, we didn’t have the chance to pass from Rifugio Cinque Torri near the impressive Cinque Torri (Five Towers), nor through Rifugio Scoiattoli, Rifugio Averau, Nuvolau (mountain), Rifugio Nivolau and, through Ferrata Ra Gusela, to Passo Giau.
On the other hand, we had the chance to pass from the amazing alpine lake Lago de Federa and its Rifugio G. Palmieri.
Day 4: Rifugio Città di Fiume - Rifugio Passo Staulanza - Malga Vescovà - Casera Pioda - Rifugio Coldai - Lago Coldai - Forcella Col Negro - Forcella di Col Rean - Rifugio Vazzoler
Guide stages: 6 and 7
Paths: 472, 568, 561, 556, 560
Description coming soon.
Day 5: Rifugio Vazzoler - Forcella Col dell'Orso - Forcella del Camp - Rifugio Carestiato - Rifugio Passo Duran - Ponte di Caleda Vecchia - Forcella Dagarei - Malga Moschesin - Forcella del Moschesin - Rifugio Pramperet
Guide stages: 8 and 9
Paths: 555, 554, 549, 543
Description coming soon.
Day 6: Rifugio Pramperet - Malga di Pramper - Forno di Zoldo (variante)
Guide stages: Mentioned as possible exit in stage 9, we took this to escape rain and thunderstorms coming from Belluno. There is a bus going from Forno di Zoldo to Belluno, but only on working days. Thankfully, a very kind Italian family from Belluno offered to give us a ride.
Paths: 523
Description coming soon.
Found this useful? Subscribe for more!
Disclaimer
No guarantee is given about the correctness or accuracy of the information contained in this post. Anything that happens to you while trusting a part or all of the information contained in this post is your sole responsibility.